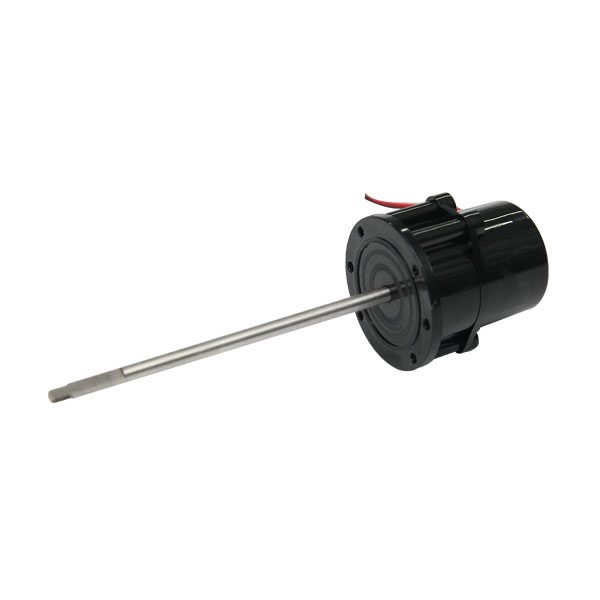
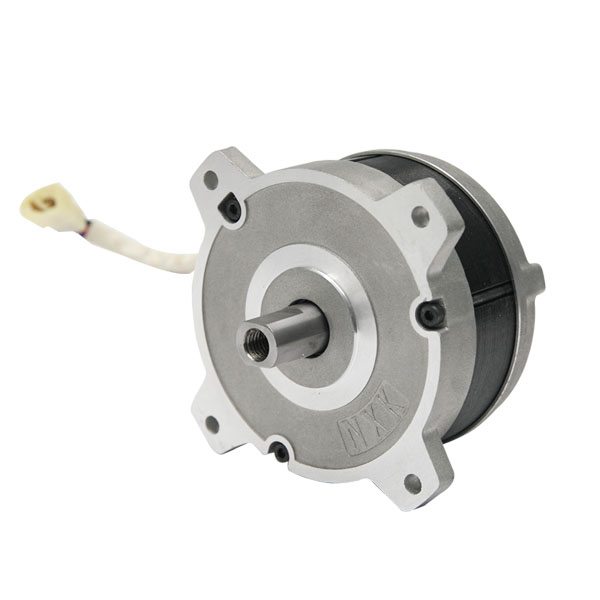
Quality Inspection for NXK72C500 brushless motor for sewing machine to Bangladesh Manufacturers

Short Description:
Quality Inspection for NXK72C500 brushless motor for sewing machine to Bangladesh Manufacturers Detail:
{6)EWA5$T9MMCT8(U}GWC.png)
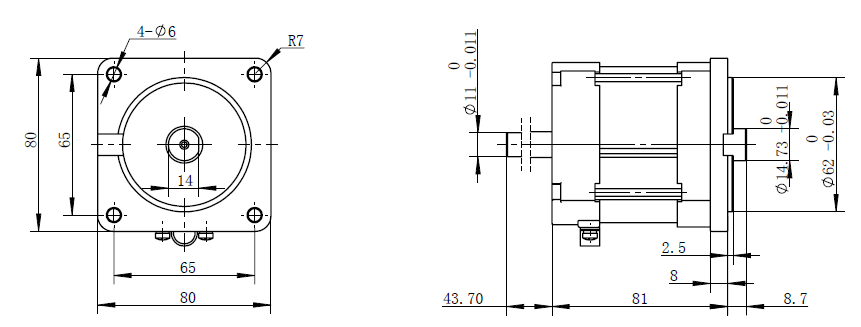
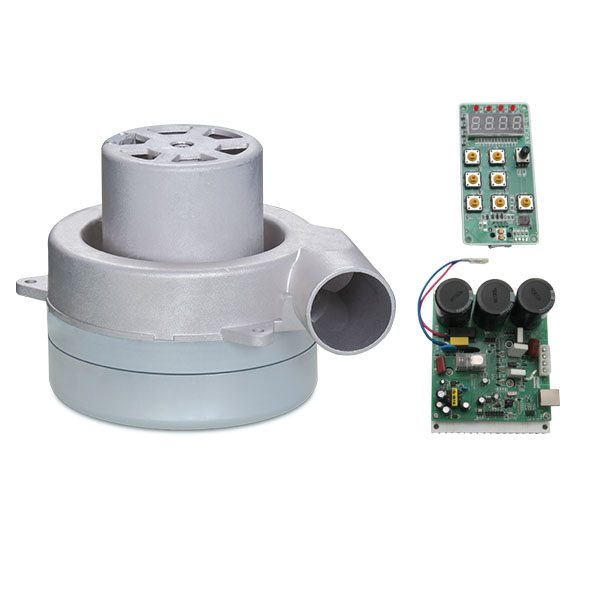
Product detail pictures:

We are ready to share our knowledge of marketing worldwide and recommend you suitable products at most aggressive costs. So Profi Tools offer you finest benefit of money and we are ready to produce alongside one another with Quality Inspection for NXK72C500 brushless motor for sewing machine to Bangladesh Manufacturers, The product will supply to all over the world, such as: Fiji , Tuvalu , Anguilla , What You Need Is What We Pursue.We are sure our products will bring you first class quality.And now sincerely hope to promote partner friendship with you from all over the world. Let's joint hands to cooperate with mutual benefits!
To replace the touch sensors on bObsweep Standard, you will need a Phillips head screwdriver, a flat head screwdriver, and a new set of touch sensors.
Before starting any repair on Bob, turn his side power switch OFF and remove his dustbin.
Then, flip Bob over onto a flat surface and remove his main brush using the flat head screwdriver.
Keep all removed screws and parts safely aside, as they may be needed for later reassembly.
Use a Phillips head screwdriver to remove the 7 screws on Bob’s underside that hold him together.
One screw on each side of the front wheel. One screw to the right of the main brush motor.
One screw on each side of the dustbin. The final two screws are in the brush compartment.
Bob’s cover is no longer secured, so hold the top and bottom together as you carefully flip him back onto his wheels.
Grip Bob’s cover from the back and lift up to expose the mainboard.
Slide the power inlet down and tuck it somewhere safe to avoid compressing its wires.
To detach Bob’s cover completely, disconnect 4 circuit plugs:
Two at the lower edge of the mainboard, near the wheels.
And two more at the top edge, near the bumper.
Bob’s cover is now completely detached and can be set aside for the rest of the repair.
There are two touch sensors in Bob’s bumper that alert him when he touches obstacles in the course of his work.
Remove the screw on each sensor and keep them safely aside for the next step. Then lift each sensor up to remove.
Place your new sensors in the open spaces. The red-wired sensor should be on the left side and the black-wired sensor should be on the right.
Once the sensors sit flat, install one screw on each sensor. When finished, you’re ready to reconnect the cover.
Reattach all 4 circuit plugs connecting Bob’s cover to the mainboard.
2 connect to the top edge of the mainboard, and 2 more that connect to the bottom edge.
Remember to slide the power inlet back into its space on Bob’s cover.
Align the cover’s edges precisely. Then, flip Bob over onto a flat surface.
Ensure that no wires are compressed in the main brush compartment or visible at the edges of the bumper.
If so, take a step back and lift the cover to tuck the wires into the appropriate spaces.
Once the wires are all safely tucked away and Bob’s cover is aligned properly, reinstall all 7 screws previously removed from Bob’s underside.
Install the main brush and dustbin before your next use and Bob is completely re-assembled.
Turn the side power switch back on and congratulations! You’ve just replaced Bob’s touch sensors. Happy cleaning!
RC Car Adventure
#—- In diesem Video seht Ihr —-#
Einbauen / anbauen eines Zusatzlüfter für
einen Brushless Motor angeschlossen an den Empfänger
———————
installation of an additional fan on the motor for extra cooling
———————
RC Car 4WD Off-Road Buggy – desert racing buggy
Wide range, good quality, reasonable prices and good service, advanced equipment, excellent talents and continuously strengthened technology forces,a nice business partner.