Wholesale Price China NXK0482-500 brushless motor for vacuum cleaner to Latvia Manufacturers
Short Description:
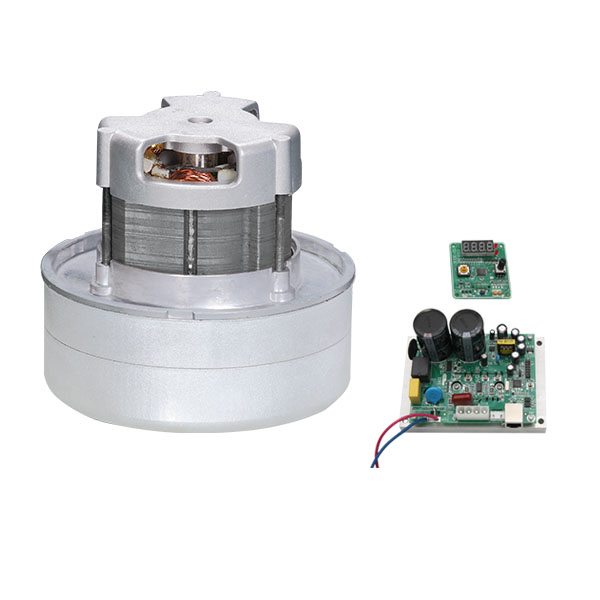
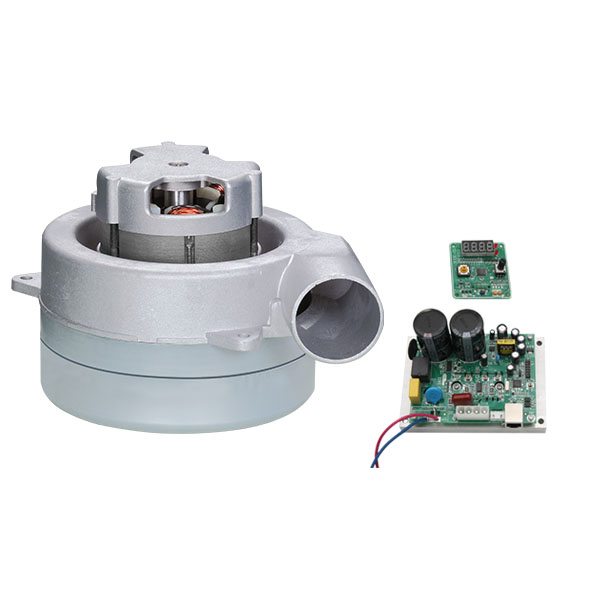
Wholesale Price China NXK0482-500 brushless motor for vacuum cleaner to Latvia Manufacturers Detail:
Specifications:
Voltage: 220V, 50Hz/60Hz
Fan System: tangential by pass, 2 stage
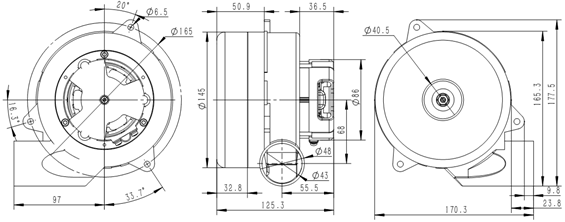
Diameter:φ145mm
Weight: 1.83kg
Insulation: F
Feature: Brushless, High efficiency, energy saving, environmental protection, long life, no sparkle.
Typical Performance
|
Sealed Orifice |
Orifice Loading |
Orifice Loading |
Max. Eff. |
|
| Orifice (mm) |
0 |
50 |
23 |
16 |
| Vacuum Pressure (kPa) |
21.89 |
1.57 |
5.34 |
9.73 |
| Air Flow (m3/min) |
0 |
2.645 |
2.167 |
1.498 |
| Air watt (Watt) |
0 |
69.42 |
192.48 |
242.37 |
| Speed (rpm) |
- |
- |
- |
- |
| Input Power (Watt) |
679.83 |
761.43 |
760.63 |
759.90 |
| Efficiency (%) |
0 |
9.10 |
25.30 |
31.90 |
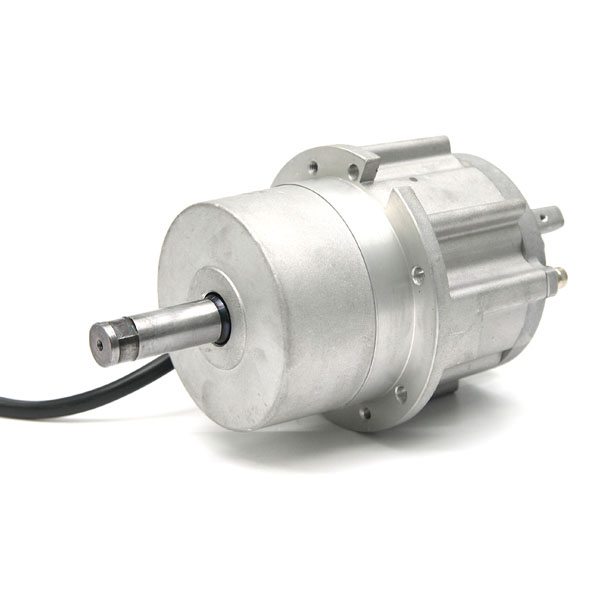
Outline Drawing
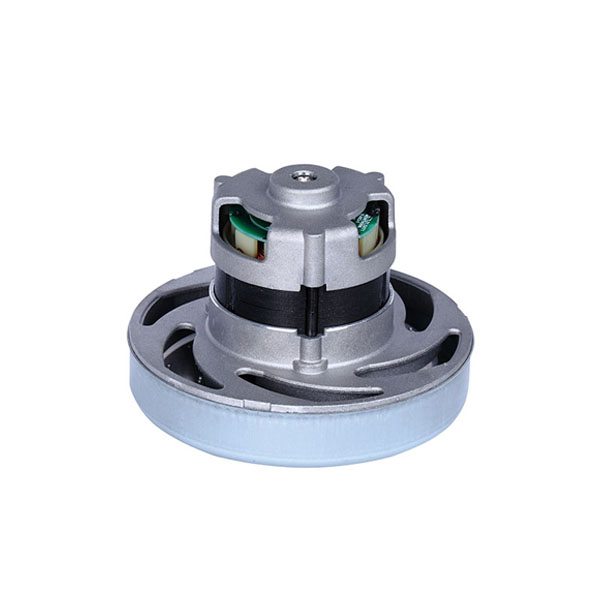
Product detail pictures:
Our personnel are generally within the spirit of "continuous improvement and excellence", and using the excellent top quality goods, favorable rate and superior after-sales expert services, we try to win every customer's believe in for Wholesale Price China NXK0482-500 brushless motor for vacuum cleaner to Latvia Manufacturers, The product will supply to all over the world, such as: Palau , Latvia , Liberia , Our items are widely recognized and trusted by users and can meet continuously developing economic and social needs. We welcome new and old customers from all walks of life to contact us for future business relationships and achieving mutual success!
https://www.vacuumspot.com.au
Super simple guide showing you how to find and check the filters on your Dyson DC04 vacuum cleaner. Even though they are sold as having life time filters I have found that over time the filters really do need to be changed every couple of years. In particular the washable one even though it can look cleaner than the post motor filter it is doing a more important job of keeping airflow up to the motor. The code for the washable filter is #DDFILTD-8
https://www.vacuumspot.com.au/dyson-dc04-washable-premotor-filter-ddfiltd-8
Follow us on twitter @VacuumGuru
To replace the power switch on bObsweep Pethair, you’ll need a Phillips head screwdriver, a flat head screwdriver, and a new power switch.
Before starting any repair on Bob, turn his side power switch OFF and remove his dustbin.
Then, flip Bob over onto a flat surface and remove his main and side brushes using the flat head screwdriver.
Keep all removed screws and parts safely aside, as they may be needed for later reassembly.
Use a Phillips head screwdriver to remove the 6 screws on Bob’s underside that hold him together.
One screw on each side of the front wheel. One screw to the right of the main brush motor. One screw on each side of the dustbin. The final screw is in the brush compartment.
Bob’s cover is no longer secured, so hold the top and bottom together as you carefully flip him back onto his wheels. Grip Bob’s cover from the back and lift up to expose the mainboard.
Slide the power inlet down and tuck it somewhere safe to avoid compressing its wires.
To detach Bob’s cover completely, disconnect 4 circuit plugs:
Two at the lower edge of the mainboard, near the wheels. And two more at the top edge, near the bumper.
Bob’s cover is now completely detached and can be set aside for the rest of the repair.
To access the power switch, first remove the mainboard.
Disconnect all remaining 12 circuit plugs from the mainboard. Press the small tab on each circuit plug and pull to disconnect.
Remove 3 screws on the mainboard. Keep them aside for later reassembly. Now lift the mainboard out of Bob.
In front of Bob’s right wheel you’ll see the side brush motor, held in place by 3 screws.
Remove all 3 and keep them aside for later reassembly.
Slide the power switch up and out of its space located on Bob’s side.
The wires feed into Bob’s battery compartment. Remove the screw holding the small wire cover, then lift it up and keep aside.
Gently pull the wiring through the gap and you’ll see the circuit junction that connects the switch to Bob’s battery. Pull to unplug.
Now you can slide the new power switch straight down into the space on Bob’s side. It will easily slide in when placed upright, with the OFF option on the bottom.
Make sure the switch is turned to OFF before connecting it to the battery.
Push the circuit junction into the side of the battery compartment so it is not stuck underneath. Then, place the switch’s wiring into the small indent on the battery compartment.
Replace the wire cover so it lies flat and install the screw that secures it. Now you’re ready to replace the mainboard.
Align the holes in the mainboard with the 3 screw posts on Bob’s interior.
Ensure that the mainboard sits flat before re-installing the 3 screws.
One screw goes in the middle of the mainboard, One in the top corner, And one in the lower corner.
Now reconnect all the circuit plugs correctly.
The order of plugs on the left side of the mainboard, from top to bottom, is:
A small plug with black and yellow wires.
A plug with two pairs of twisted wires
A plug with multi-colored wires for Bob’s left wheel,
A plug with blue and black wires.
The order of plugs at the top of the mainboard, from left to right, is:
A wide plug with multi colored wires,
Two empty spaces for now
And a small plug with black and orange wires in the top right corner.
The order of plugs on the right side of the mainboard, from top to bottom is:
A wide circuit plug for Junior’s power switch,
And a plug with black and orange wires for Junior’s power inlet.
For now, the bottom of the mainboard will have two open spaces on the very left.
Then, the order from left to right is:
A small circuit plug with a red wire,
One more open space,
A small plug with yellow wires,
And lastly, a plug with multi-colored wires on the very right.
Now you’re ready to begin re-attaching the cover. Reattach all 4 circuit plugs connecting Bob’s cover to the mainboard. 2 connect to the top edge of the mainboard, and 2 more that connect to the bottom edge.
Remember to slide the power inlet back into its space on Bob’s cover. Align the cover’s edges precisely. Then, flip Bob over onto a flat surface.
Ensure that no wires are compressed in the main brush compartment or visible at the edges of the bumper. If so, take a step back and lift the cover to tuck the wires into the appropriate spaces.
Once the wires are all safely tucked away and Bob’s cover is aligned properly, reinstall all 6 screws previously removed from Bob’s underside.
Install the main brush and dustbin before your next use and Bob is completely reassembled.
Turn the side power switch back on and congratulations! You’ve just replaced Bob’s power switch. Happy cleaning!
This manufacturer can keep improving and perfecting products and service, it is in line with the rules of market competition, a competitive company.